Alerts
Alert feature of the Content Management System, allows the user to update Announcements, Notifications and Tenders on their respective websites in order to keep users updated with the latest information.
The Picture below shows Announcement and Notifications section of the website of Directorate of IT & SS.
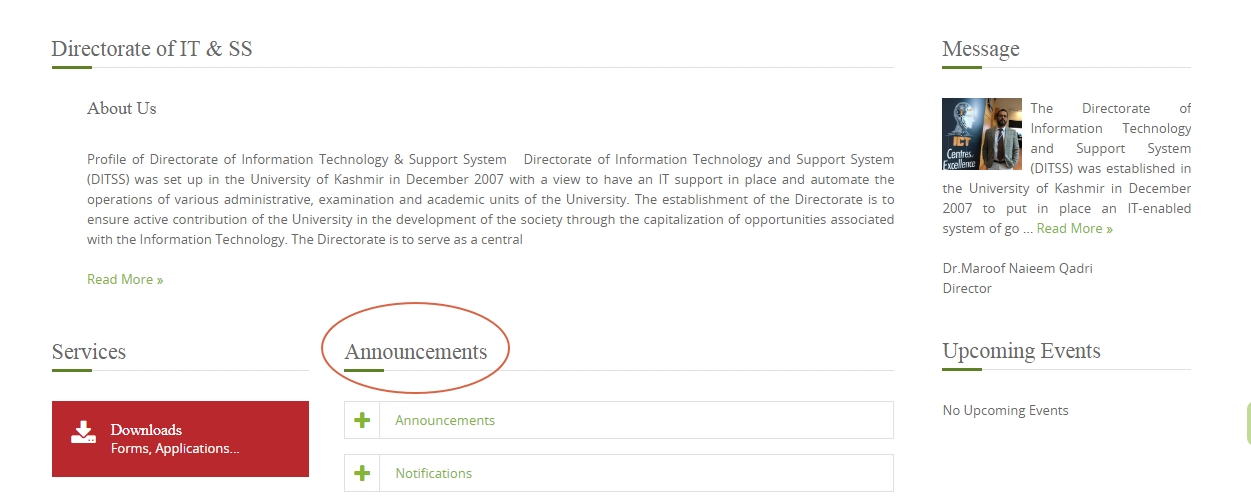
Steps to update Alerts on the website
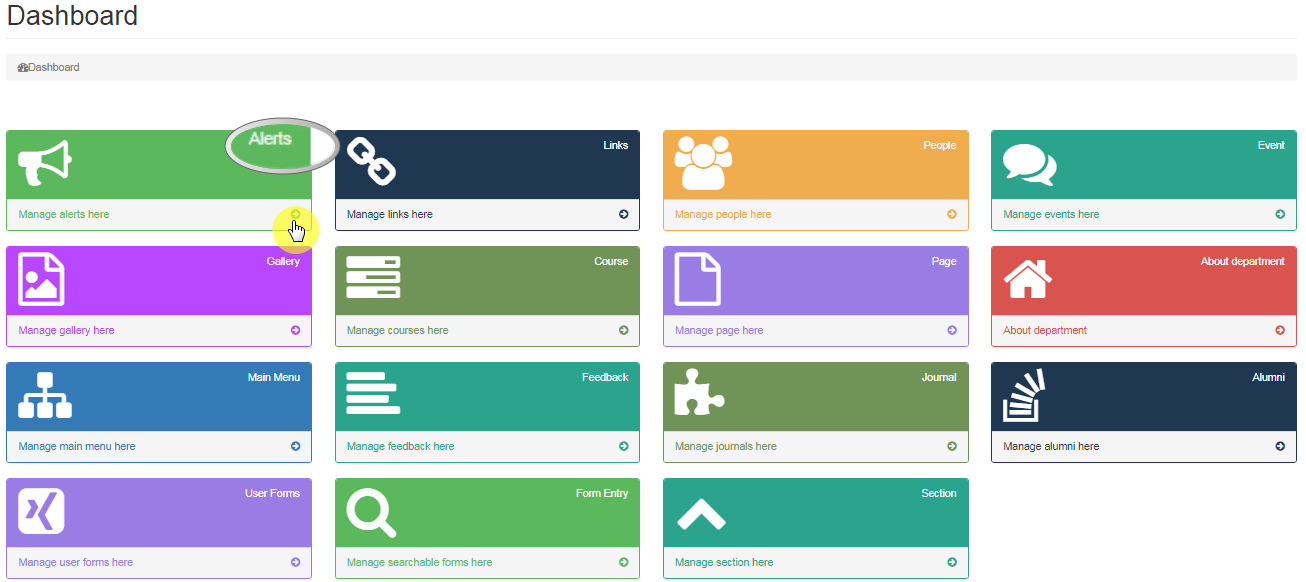
1) Select Alerts Screen
Once you have Logged in, You will be able to see the Dashboard.
Click on the highlighted arrow pointer, to go to Alert screen.
2) Alert options
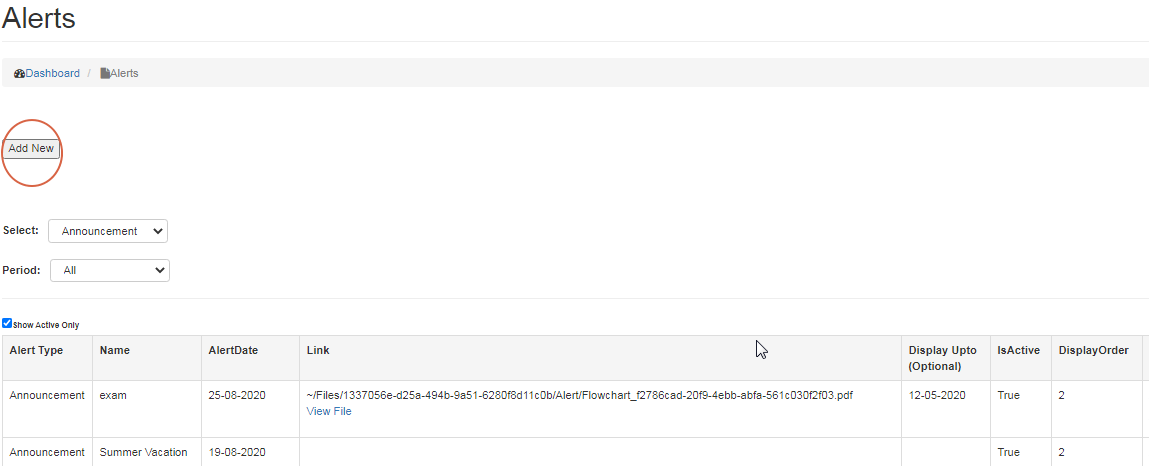
Once you click on the Alert link, you will see the screen shown below.
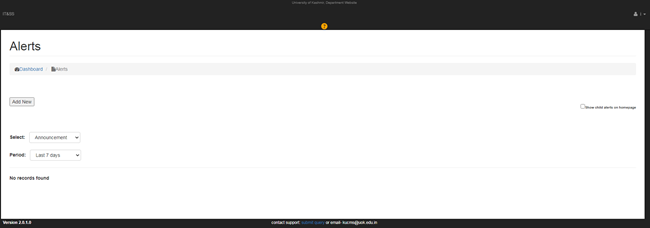
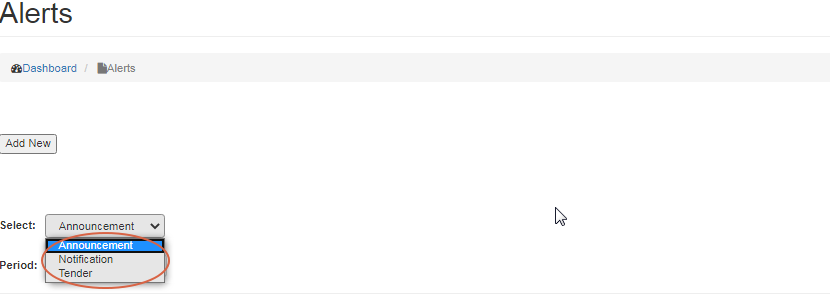
You can select alert using Select and Period options.
Select, has a drop down menu with three options namely; Announcement, Notification or Tender. You can select any one among the options available.
Period, has four options namely; Last 7 days, Last 30 days, Year and All. You can select option, based on the time period for which you want to see alerts.

Based on the options selected above in Select and Period, a list showing alert for a given period of time will appear on the screen.
To post a new alert on the website, Click On Add new button.
3) Details on Add new Screen
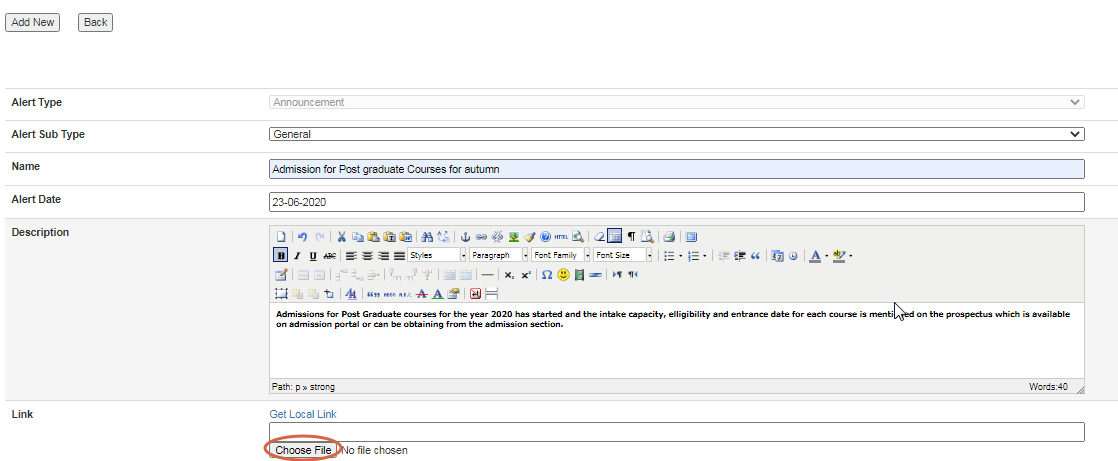
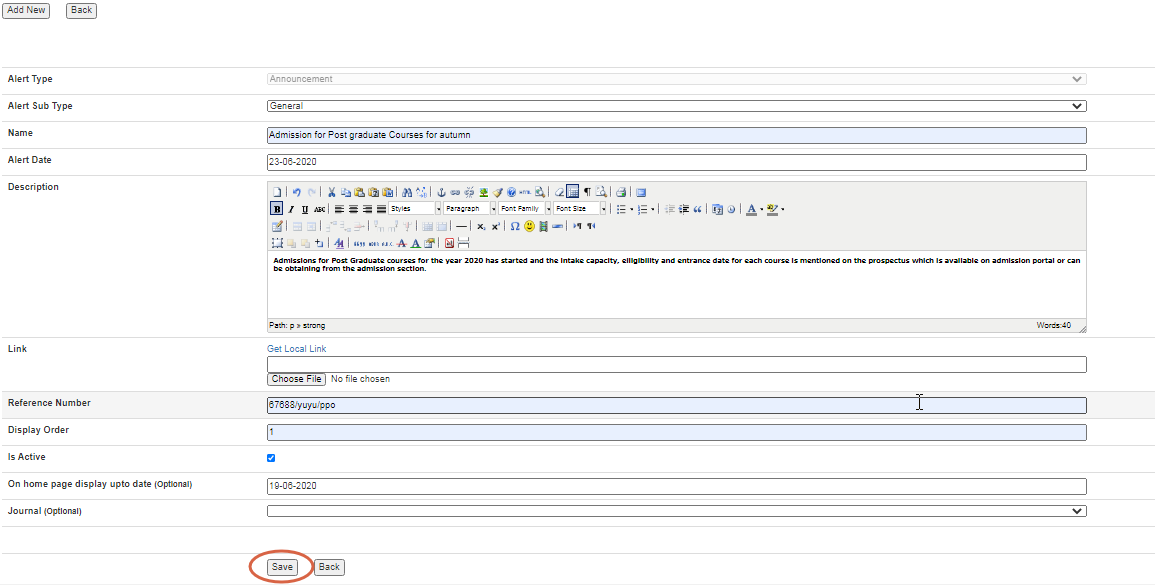
After having familiarized yourself with the Alert screen, now it’s the time to know about the details that need to be filled in Add new screen after clicking on Add new button.
- Alert Type
You need to select whether an alert is Announcement, Notification or Tender, for which you need to make selection from the drop down menu.
- Alert Sub type
Alert Sub type has drop down menu with two options namely General and Job. If an alert is regarding a job, then select job as a sub type, otherwise select General.
- Name
Giving a Name to the alert is the most important thing to do before proceeding with the other details as Name will be displayed as a link.
- Alert Date
Mention the Date for the Alert.
- Description
You can either provide description or link.
- Link
Link is used to redirect the user to a different page, website or file. Link can be selected using any of the following ways:
- Click on choose file and you can upload a file from your device.
OR
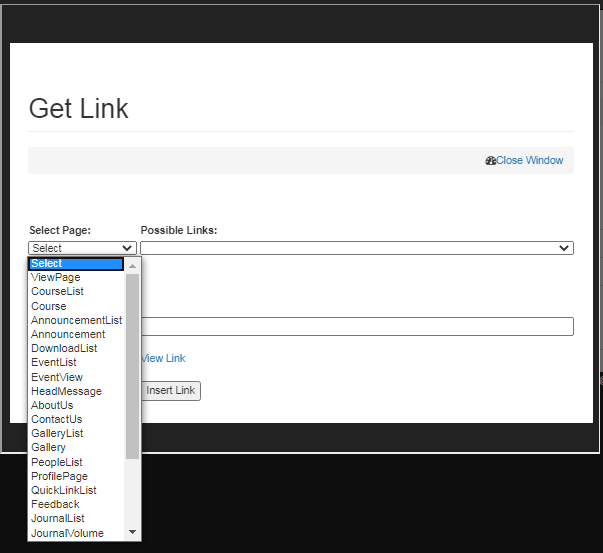
- Click on Get local Link to see a window popping up on the screen; choose from the Select page drop down menu where you want to redirect the Page, once the user clicks on the alert. Click on Insert Link. To confirm if the Alert has been linked, click on view link.
OR
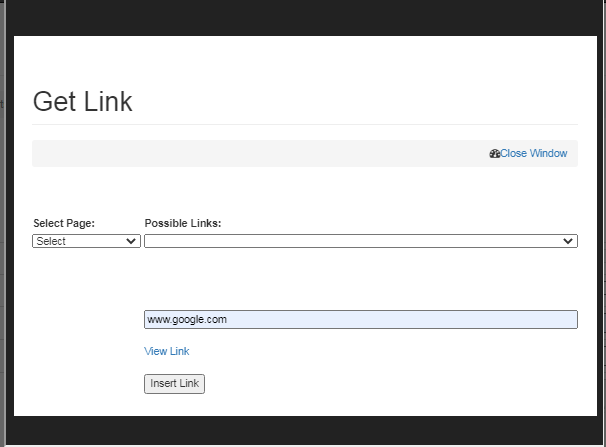
- Enter the url of the website, where you want to redirect the Page once user clicks on a particular alert Page e.g www.google.com and click on Insert Link.
- Reference Number
You may enter reference number of the alert. (Announcement, Notification or Alert).
- Display Order
You can use display order to arrange Alerts, in sequence with respect to one another.
- Is Active
Is Active allows user to select whether the Alert, is to be made Visible or not on the website.
- On Home page display upto date
This is an optional feature which refers to the date, until an Alert is going to be displayed on the Home Page.
Once relevant details are entered, click on Save button.
To go back, click on Back button.
Editing /Deleting an Alert
From the Select and Period drop down, choose the relevant Alert for desired Period so that all the Alert types appear on the screen.
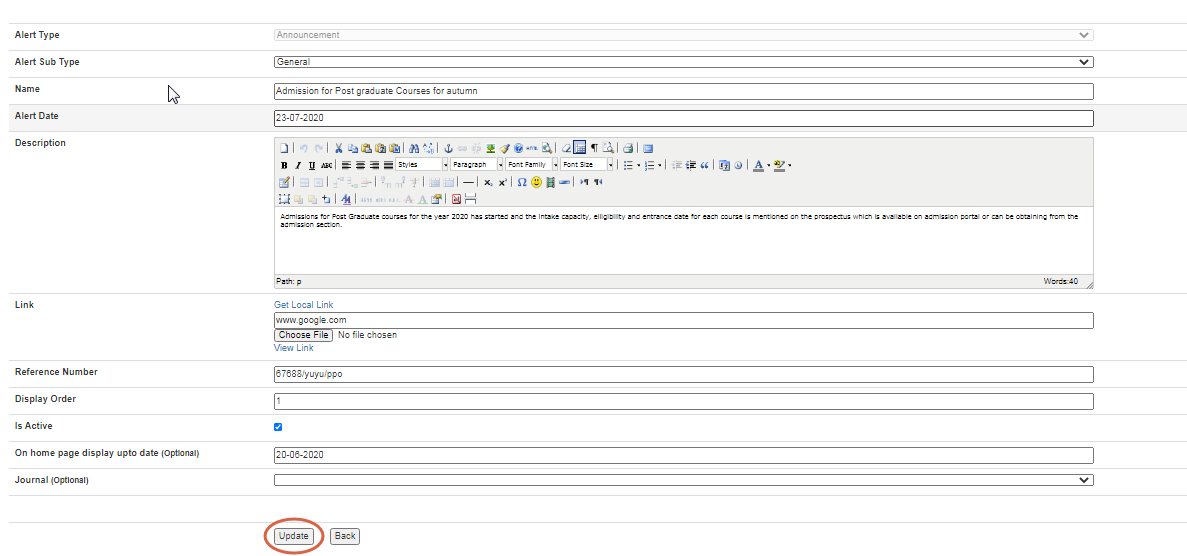
To Edit alert details,
- click on Edit button, as shown below.

- Make changes and click on Update button.
- To Delete an Alert, click on Delete button as shown below.

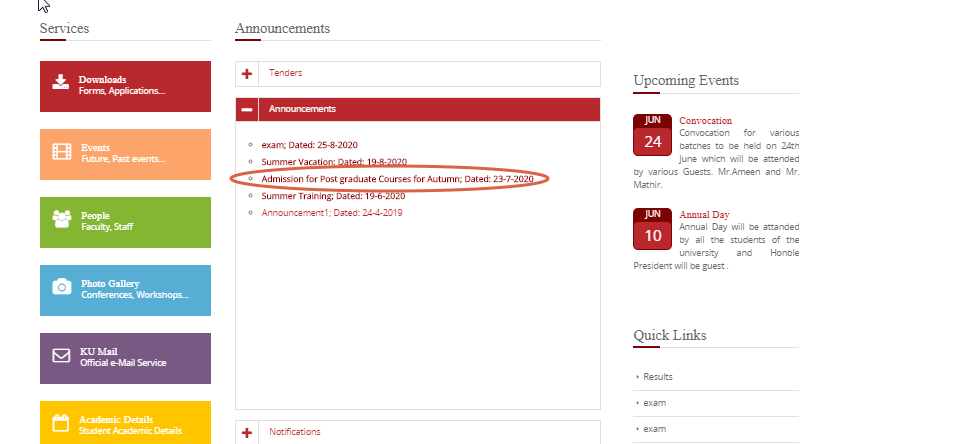
Alerts will appear on the Home Page as shown below.
Created with the Personal Edition of HelpNDoc: Easily create EPub books